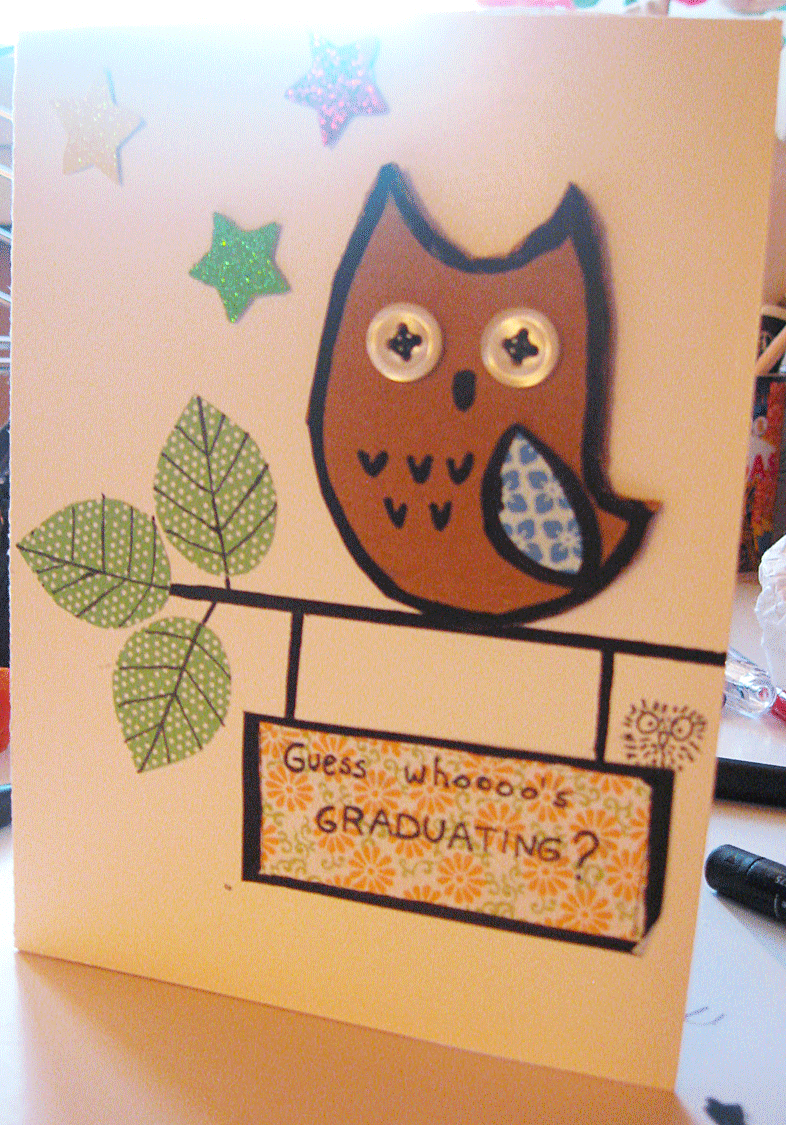
Mio fratello minore ha appena terminato la maturità! Evviva! Per festeggiare ho preparato una bella torta con questa ricetta come base più panna, crema e fragole poi ho fatto questo biglietto con gufo da accompagnare al regalo dei miei genitori: l'aifon™.
Il gufo è molto semplice da realizzare. Una volta fatto potete utilizzarlo non solo per decorare biglietti a vostro piacimento ma anche per sigillare regali o potete appenderlo da qualche parte. sta a voi decidere.
My brother recently graduated from high school! Yay! To celebrate the event I cooked his favourite cake starting from this recipe and decorating it with strawberries, whipped cream and custard. Then I made this cute greeting card to accompany the gift from my parents: the i-fon™.
This owl greeting card is super easy to make and once you've made the owl you can use it not only to decorate your cards but also to seal presents or to hang it somewhere. It's up to you ;-)
Materiali:
- Cartoncino robusto.
- Pennarello a punta grossa.
- Matita.
- Carta colorata.
- Due piccoli bottoni bianchi per realizzare gli occhi.
- Filo nero.
- Ago.
- Forbici.
- Colla.
Materials:
- Robust cardboard.
- A black marker.
- A pencil.
- Colored paper.
- 2 small white buttons for the eyes.
- Black sewing thread.
- Needle.
- Scissors.
- Glue.
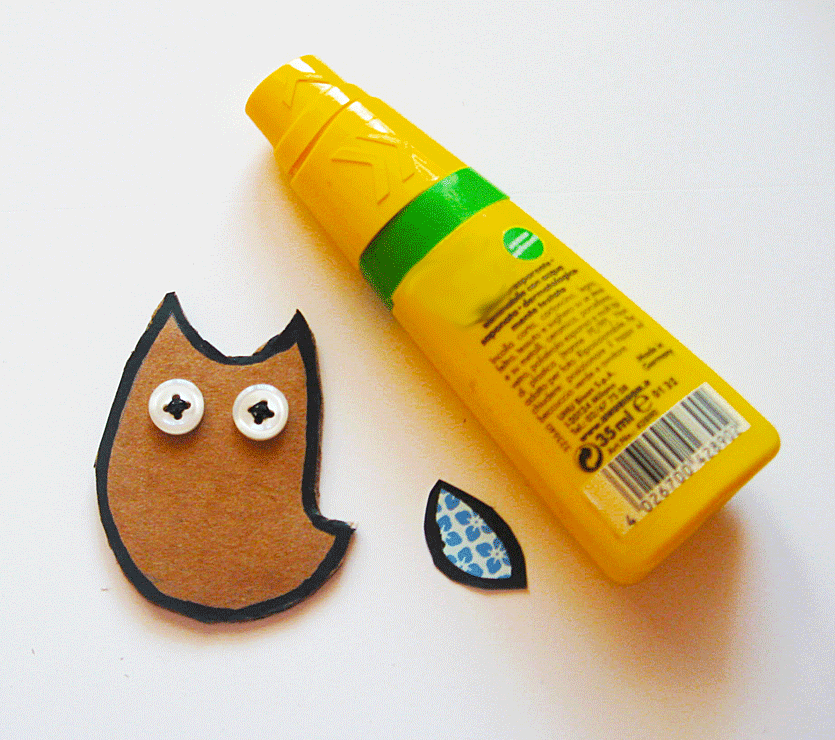
Step 1) Tracciamo il disegno del gufo a matita poi ripassiamo col pennarello nero. Per assicurarci che la sagoma non sia né troppo piccola né troppo grande mettiamo i bottoni al suo interno prima di ripassarla con il marcatore.
Step 1) Trace the outline of your owl with a pencil first then with the marker. You can make sure that the outline isn't to small or too big by placing the buttons inside it.
Step 2) Ritagliare il gufo seguendo il disegno.
Step 2) Cut out the owl following the outline you traced.
Step 3) Decidiamo dove porre gli occhi del gufo e cuciamoli con ago e filo. Dato che il gufo sarà appiccicato sul bigliettino, non importa che le cuciture sul retro siano perfette. Le mie, per esempio, erano tutte storte.
Step 3) Decide where to place the owl's eyes then sew them onto the cardboard. If the stitches on the back are not perfect don't worry. This part will be glued on your card/present/scrapbook and nobody will see it.
Step 4) Ritagliamo un pezzo di carta colorata a nostra scelta dandogli la forma dell'ala del gufo. Scegliete pure una forma che vi sia congeniale: la mia è solo un'opzione. Incolliamo l'ala al fianco del gufetto.
Step 4) Cut a piece of colored paper to make the owl's wing. Shape it as you please: mine is just an option. Glue the wing to the side of your owl.
Step 5) Sempre con il pennarello a punta grossa disegniamo i particolari: il becco e le piume del gufo. Se non vi sentite sicuri al primo colpo, tracciate prima il disegno a matita e poi ripassate col marker.
Step 5) With your marker, draw the beak and the feathers. If you don't feel sure of your drawing skills, trace the details with a pencil first.
Step 6) Ora decidete come impiegare il gufetto. Io ho fatto questo bigliettino per mio fratello ma ci sono un sacco di possibili variazioni! Fatemi sapere.
 |
| Dentro al biglietto, eheheh. Inside the card, ehehe. |
Alla prossima,
Until next time,
Alice


No comments:
Post a Comment